Announcement:
Here is an intrusion from the future (February 2010). When I wrote the post below, it was prior to stumbling upon a website that would set my pizza-making on an entirely new course. I’m referring to Jeff Varasano’s rave on sourdough pizzas. Quite simply, my strong conviction now, having tested Varasano’s assertions for myself, is that sourdough pizzas are better than any dry yeast version. The recipe below is fine, so go ahead and try it by all means, but if you want to bake the best, go straight to the following post and do not pass ‘Go’: Sourdough Pizzas – As Good As Home Oven Pizzas Get!
Announcement ends.
As promised in the previous post, here’s my recipe for DIY pizza. This is the result of a lot of research, trial and error. Over months of systematic tweaking (one change at a time, so the results could be validly compared), I am now satisfied that I am turning out pizzas that are pretty damned good. The benchmark by which I gauge pizza excellence is set by Sandrino’s wood-fired pizzas in Fremantle – the best I have had in Perth.
Mine are not yet quite as good, but they are close – if you can turn out better pizzas than these from a domestic electric oven, PLEASE post your suggestions under Comments. This is not about ego. It’s about sharing the love! And if you love pizza as I do, I know you’ll know exactly what I mean.
OK, on to the recipe.
First, read the following:
Right, are you all sitting comftibold, two-square on your botty? Then I’ll begin….(If you haven’t heard Stanley Unwin’s intro to The Small Faces’ eccentric and wonderful Ogden’s Nut Gone Flake album, you’ll be WTF-ing all over the place…see here and here if you require further illumination).
Equipment
30cm pizza pan
pizza stone
egg flip or bakers’ peel
large mixing bowl
smaller bowl for yeast/water mix
bread-and-butter knife for mixing
Dough Ingredients (for two 30cm pizzas)
1 satchel dry yeast (5gm)
1 cup cold water (yes, cold)
3/4 to 1 1/4 teaspoons salt*
1/2 tablespoon unrefined brown sugar
3 tablespoons extra virgin olive oil
2 1/4 cups pizza flour, sifted
3/4 cup fine semolina**
1 tablespoon rye flour (processed, not whole-grain)***
milk (as needed – see Method below)
*I use a bit over 1/2 teaspoon of salt, due to my partner’s low-sodium requirements…you do need that much, because salt has an effect on the yeast and contributes to the quality of the dough. If flavour was the sole consideration, I’d use 1 – 1.5 teaspoons of salt.
** I’ve found the semolina keeps the risen dough more flexible and workable than using flour alone.
***Optional, but rye is a natural dough enhancer and adds to the flavour.
Method
Knead by hand for 12 minutes.
Tomato Sauce for Base
Ingredients
1 clove garlic chopped
1 can diced tomatoes
basil
oregano
black pepper (freshly ground)
Method
Heat olive oil in frypan over moderate heat. Add garlic, fry for 30 seconds (don’t let it colour), add tomatoes and herbs. Mix, add black pepper (and salt if you want – I leave it out). Cook gently to a thick, spreadable sauce consistency. Leave to cool.
Heat your oven to 230 degrees, with the pizza stone inside on the uppermost shelf. Leave enough room beneath for the pizza to go in on a pizza pan.
Assemble pizza
Divide dough into two balls. Leave one aside, covered, in bowl.
If you’re experienced in tossing pizzas to shape them, this is your chance to show off. If you’re a mere mortal, don’t use a rolling pin, which tends to iron out all the air from the dough – do it this way:
Flatten the dough out on your bench top, using the heels of your hands and fingers. Work the dough outwards into a circular shape, trying to keep the base even and avoiding any tears or thin patches. If the dough contracts and is hard to work, let it rest for 5-10 minutes, during which the gluten will relax.
When it is about the right size for your pizza pan, sprinkle the pan LIBERALLY with corn meal. Without this, your pizza will stick to the pan while baking. Pick the pizza dough up carefully and place in pan. Gently work the edges to the sides of the pan (or don’t bother if you are not fussy about shape). Make sure you have a raised rim to give the pizza a nice edge.
Add your toppings
Start by smearing olive oil over the base with your fingers, making sure to include the rim, then lightly sprinkle with dried oregano. Now spread the tomato sauce thinly. Then add your toppings. Less is better than more! Don’t overburden your base.
Baking
Put pizza (in the pan) on bottom shelf of oven. Bake for 5 minutes.
Now to the tricky part. Quickly remove the pan and slip the pizza off it and on to the stone, using the egg flip to gently free any sticking sections. If you have spread enough corn meal on to your pan, you should be able to ease the pizza over the edge of the pan and shake it on to the stone easily. If not, you might have to bake it a bit longer in the pan before again attempting to transfer it to the stone. (Don’t feel too bad if you stuff up – it’s almost a given that you’ll make a mess of a couple of your first pizzas before you get this step right. They might not look great, but the flavour will still be there).
Bake for another 7 minutes or so on the stone. Timing the baking perfectly is partly a matter of experience and feel. If it is nicely browned on top, that is often the best indication that it’s ready. Bake it too long and the crust will be hard and brittle, too short and the base won’t be cooked through. There is some margin for error here, but it is small. Keep the faith – you will get better with a bit of experience.
Toppings Suggestions
The good ol’ margarita (or margherita, if you prefer the Italian spelling) is hard to beat IMO. That is, slices of fresh tomato, mozzarella (pieces distributed over the top, rather than grated), with black pepper ground over the finished pizza and a few fresh basil leaves scattered around.
Another one I love:
Fresh ricotta crumbled over the tomato sauce topping, with mushrooms, pre-fried eggplant slices, red onion slices and pepperoni, with pieces of mozzarella here and there.
Or:
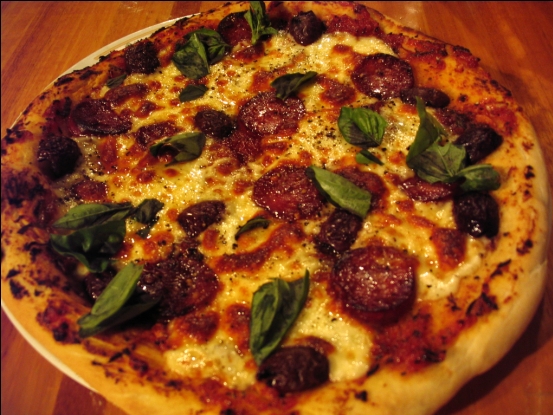
Tomato sauce topping, plus pipped olive halves and pepperoni (Mondo Doro hot cacciatore is the best I’ve come across in Perth – IGA stocks the Mondo Doro lines), and mozzarella scattered around (or grated), finished off with fresh-torn basil leaves.
Oh, and I always serve my pizzas with fresh-cut chilli in quality olive oil. I’m salivating all over the keys as I type.
Experiment! Do it YOUR way – this is the beauty of home-made pizzas! You can make them exactly how you want them. And once you’ve got the hang of it, you can expect to turn out something like this (one of my earlier efforts, before sodium content was an issue):
Happy baking! But a warning: once you start turning out masterpieces of your own, you’ll never be able to look a Domino’s, Pizza Hut or Eagle Boys abomination in the eye again – not without feeling compelled to sneer contemptuously at the sorry-looking plastic mutant, anyway.
Best of baking to you!
Related posts:
Read this at work on Friday Rolan, and coudn’t stem the flow of mouth-water. Looks fucking delicious. Only step you’re missing for my purposes is “get your oven fixed”. Sandwich toasters actually cook a meat pie pretty good but mines a little small for a pizza stone.
Commiserations, Dick. Good to see that I’m appealing to a busted-arse demographic I can identify with.
If you get on to a REALLY good pie, lemme know. That’s a joy to behold – and a rare one.
Very interesting. I have been experimenting with pizzas for a few years and amazingly have come up with more or less the same recipe.
I went one step further and built a brick oven so I could also bake cottage type bread. I knew nothing about brick laying so borrowed a book from the library called The Bread Builders. My oven works even if it looks very rustic.
My grandkids wouldn’t miss a “Grandpa’s pizza night for quids”
Peter Gold Coast! Are you still there? I must apologise for ignoring your post! I didn’t mean to – I read it, but for some reason neglected to respond. SORRY!
That’s amazing that you came up with the same dough formula, or much the same, but may I ask, are you referring to my sourdough pizza formula, or the one above? I never use the dry-yeasted one above now.
Recently, I’ve made a few tweaks in my technique to simulate the finish you get from a WFO, and am intending to share these in a future post. Won’t interest you, I guess, since you have the real deal in your backyard!
Best of baking to you!
Cheers
rolanstein
Hi – thanks for the tips. My pizza making has now exceeded anything we can get commercially here in Logan (BrisVegas) and that’s just by getting a reasonable dough, giving it time and using fresh ingredients from the garden where possible. Our basil, oregano and garlic is seasonal but usually home grown. I must say that growing up on a dairy farm, it was pretty inevitable I’d make cheese. I can whip up a creamy, stretchy fresh mozza ball in 30 minutes using the non-fermented method which is perfect for pizzas. My wife takes that long to get the bases sorted and topped and the oven up to speed. I can thoroughly recommend making cheese at home. It’s simple and again, you can make better than you can buy. Look for the book by Valeria Pearson “Cheese Making in Australia” it’s good and it’s locally biased. For once. Thank you again. Sourdough is next…